
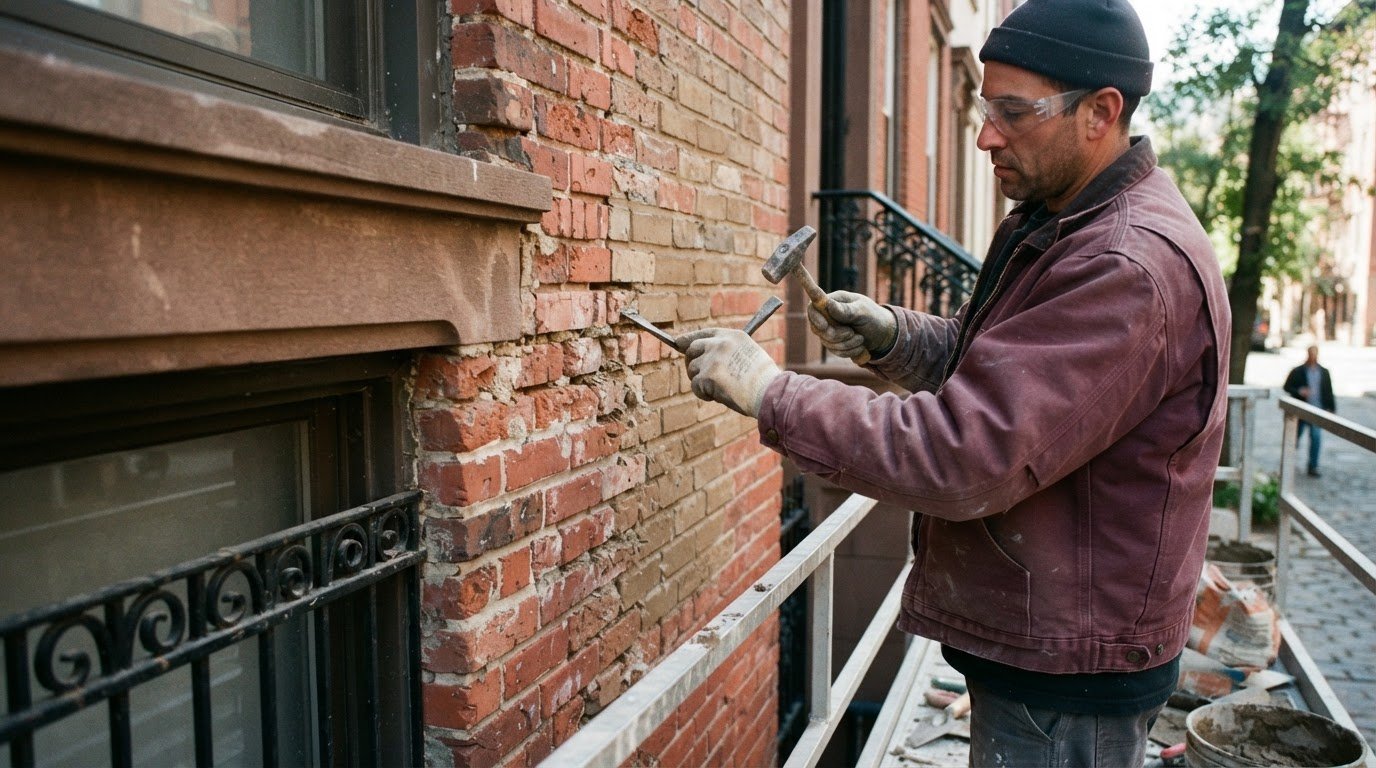
The brickwork you see depends on the mortar joints holding it together. Brick pointing renews the exposed mortar in those joints, helping maintain the masonry and its appearance. The work involves removing defective mortar and replacing it with fresh mortar suited to the existing brickwork.
Cracked or missing mortar is easy to notice, but the replacement material and preparation matter just as much as the finished surface. This article explains what pointing does, how masons match replacement mortar to original materials, and how they prepare joints before adding fresh mortar. Careful removal and a compatible joint finish help protect the surrounding brick.
Table of Contents
Matching replacement mortar to original materials
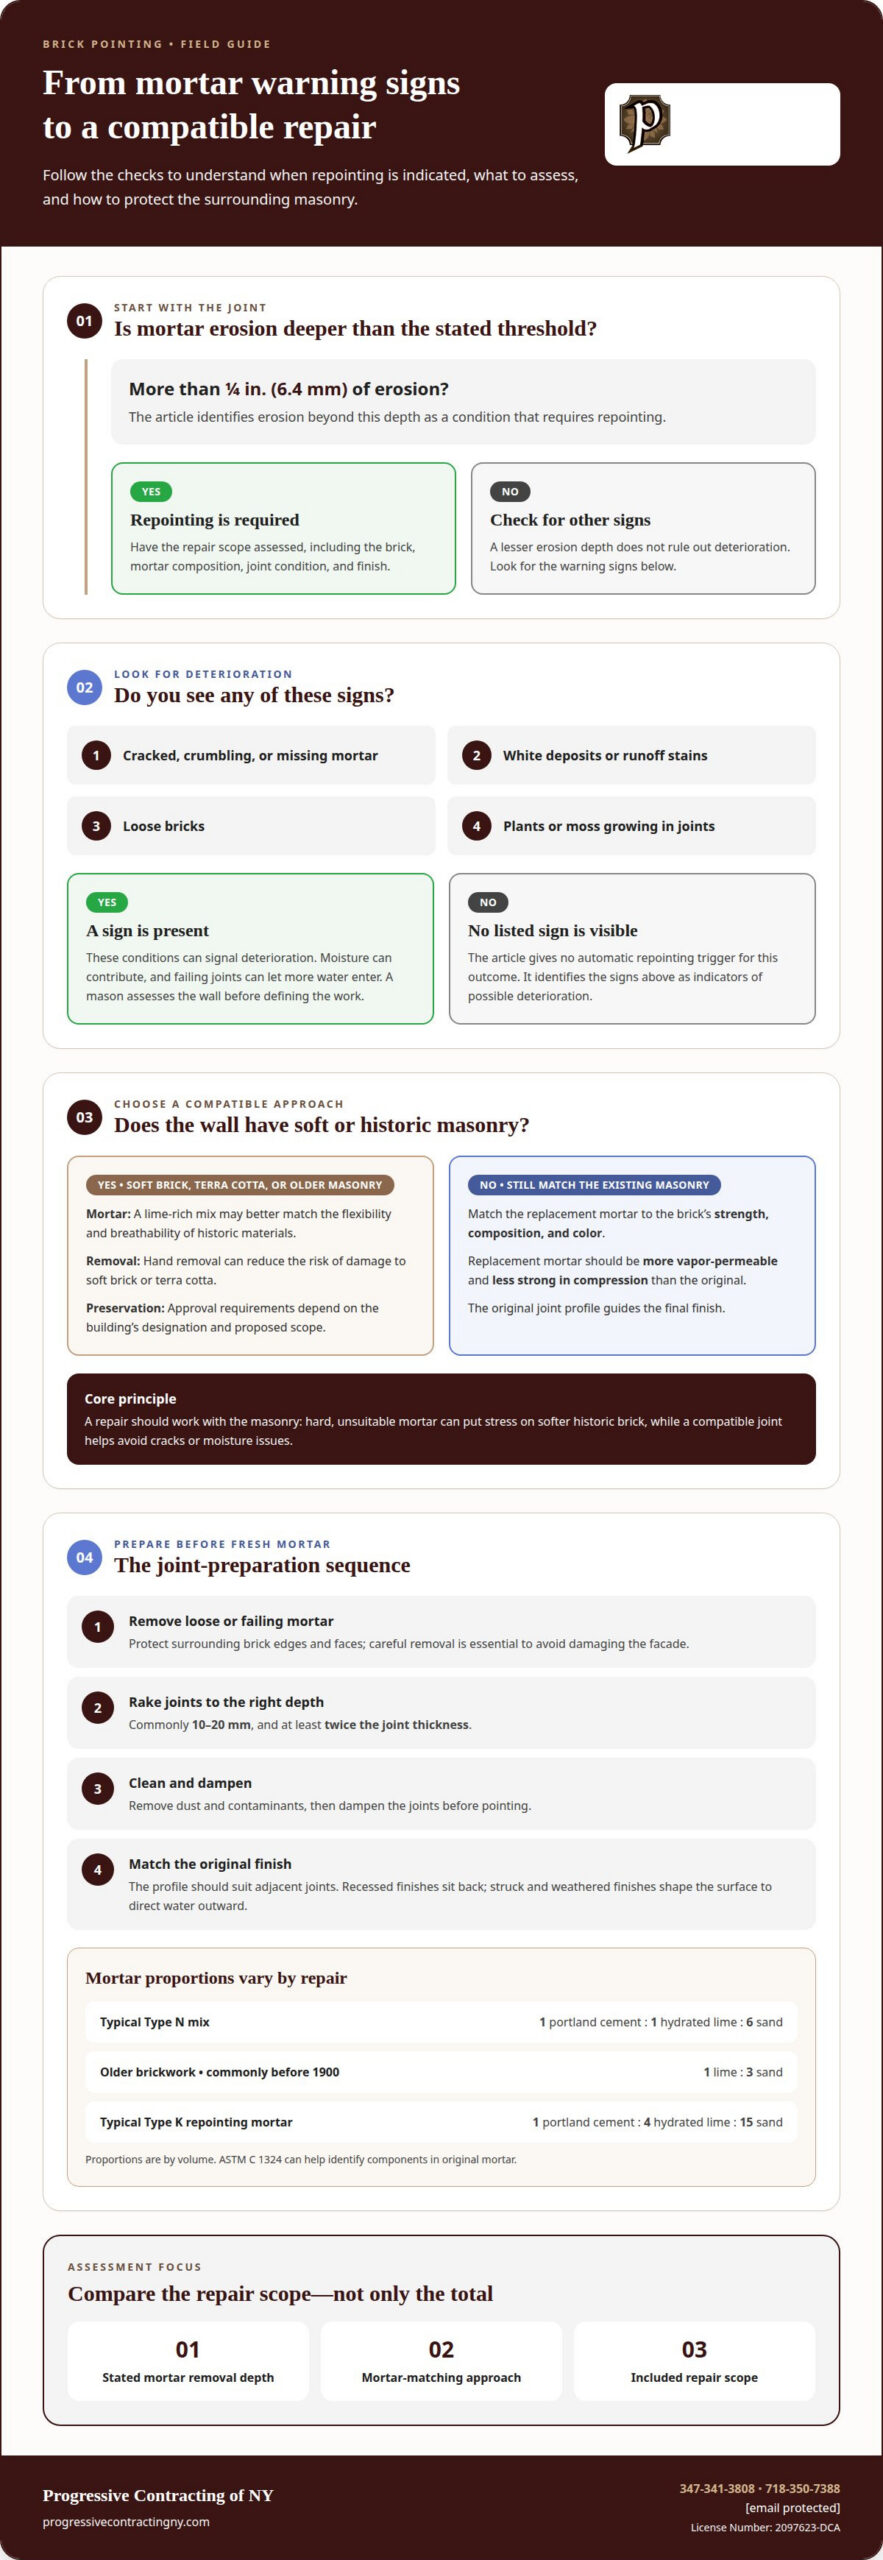
Replacement mortar should suit the brick’s strength, composition, and color. It should also be more vapor-permeable and less strong in compression than the original mortar. This balance allows moisture to move through the wall instead of becoming trapped behind a hard repair. For older masonry, a lime-rich mix may better match the flexibility and breathability of historic materials.
Mortar proportions vary, so a standard mix isn’t right for every restoration. A typical Type N mix uses 1 part portland cement, 1 part hydrated lime, and 6 parts sand by volume. Brickwork built before the turn of the twentieth century commonly used lime and sand in a one-to-three proportion. ASTM C 1324 can help determine the components in original mortar, supporting a closer match in repairs.
Old mortar must come out without chipping the surrounding brick. Joints are commonly raked to a depth of 10 to 20 mm before fresh mortar is applied. On masonry with soft brick or terra cotta, hand removal can reduce the risk of damage. The original joint profile also guides the final finish.
Cracking, crumbling, missing mortar, white deposits, runoff stains, loose bricks, and plants or moss in joints can signal deterioration. Moisture can contribute to these signs, while failing joints can leave pathways for more water to enter. Erosion exceeding 1/4 in. (6.4 mm.) is a condition that requires repointing.
Before defining the work, a mason assesses the brick, mortar composition, joint condition, and finish. When reviewing estimates, compare the stated removal depth, mortar-matching approach, and repair scope, not just the total.
Typical Type K repointing mortar proportions by volume are 1 part portland cement, 4 parts hydrated lime, and 15 parts sand. Compatible pointing mortar helps avoid cracks or moisture issues.
Preparing masonry joints for pointing
Preparation gives fresh mortar a clean, sound joint to bond with. Removal depth, moisture control, and the chosen finish all affect the wall’s appearance and performance.
Raking Out and Cleaning Joints
Raking out means removing loose or failing mortar before installing replacement material. Existing joints are commonly cleared to a depth of 10 to 20 mm, with removal depth at least twice the joint thickness. Masons often chisel vertical joints by hand to protect brick faces. A power saw belongs only in the middle of wide, uniform horizontal joints. Clean joints of dust and contaminants, then dampen them before pointing.
A small repointing repair may be manageable, but full-wall work and delicate historic masonry call for skilled handling. Careful removal is essential: damaging a brick face can undermine the repair and alter the facade.
Preservation requirements can affect exterior masonry work on historic properties. Whether approval applies depends on the building’s designation and the proposed scope, so the answer varies by property.
Choosing Mortar Joint Profiles
A joint profile is the shape of the finished mortar surface. Matching the original style helps preserve the masonry’s appearance and keeps new work consistent with adjacent joints. A recessed finish sits back from the wall, while struck and weathered finishes shape the surface to direct water outward. The profile should suit the existing brickwork, not just a preferred look.
Fresh mortar can be placed with a trowel or pointing gun, then shaped as it firms. Full-wall preparation can take a day or two; repointing a typical two-story row house can take a week to ten working days. Mortar joints typically last more than 25 years, depending on exposure and materials. Work needs conditions that allow controlled curing, since rapid drying, rain, or freezing can interfere with setting. For masonry restoration work, preparation and finishing are planned around the existing wall.
Definition and purpose of brick pointing
Brick pointing renews the external part of mortar joints between masonry units. ASTM E 2260 defines repointing as removing defective mortar and placing fresh mortar. The aim is to restore the joint, not to replace sound brick or conceal damage elsewhere in the wall.
Brick pointing and tuckpointing aren’t identical terms. Repointing replaces defective joint mortar; tuckpointing adds a narrow, contrasting line to create a crisp appearance. A typical tuckpointed joint uses a groove 5 mm wide and 3 mm deep, with a small projection of about 3 mm.
Mortar joints help protect masonry by limiting pathways for water and supporting the bond between brick units. As mortar deteriorates, gaps can let moisture in, while freeze-thaw cycles and movement can worsen cracks. Replacing failed mortar can restore the joint’s function, but it does not correct movement or repair damaged brick on its own.
The removal stage is critical. Workers carefully remove defective mortar while protecting the brick edges, then place compatible replacement material into the prepared joint. Mortar with unsuitable strength can put stress on softer historic brick. The goal is a sound joint that works with the masonry, not a hard patch that shifts damage to surrounding units.
The key distinction: pointing addresses failed mortar joints, while tuckpointing describes a decorative joint treatment. If bricks are loose or cracked, the repair scope should also address those masonry defects.
Explore brick pointing services
Progressive Contracting NY Corp: Brick Pointing
Progressive Contracting NY Corp handles worn mortar as part of brownstone facade renovation and historic exterior work. If joints are crumbling, brick faces are exposed, or the facade shows signs of moisture, a masonry assessment can clarify the repair scope and how the work should fit the existing building.
Related services include brownstone stoop restoration and masonry contracting in Brooklyn and Manhattan. When deteriorated joints occur alongside other facade concerns, coordinating repairs can help keep the restoration consistent with the property’s materials and appearance.
Contact Progressive Contracting NY Corp to discuss your masonry concerns. Call 347-341-3808 or 718-350-7388, or email ProgressiveContractingNY@yahoo.com. License Number: 2097623-DCA.
Plan the Next Step for Your Masonry
Mortar repairs work best as part of a considered plan for the building exterior. If you notice failing joints or broader facade wear, discuss the masonry’s condition and the scope of work needed. Progressive Contracting of NY provides brick pointing, brownstone facade renovation, Brownstone Facade Restoration, and Rammstein stoop restoration in Brooklyn and Manhattan.
A focused conversation can connect the visible problem with suitable restoration work, whether the concern is limited to mortar joints or involves the surrounding facade. Share what you’ve noticed and where it appears on the property.
Thoughtful repairs can give you a clearer path forward for caring for your building’s masonry.
Frequently Asked Questions
What does pointing brickwork involve?
Pointing renews mortar at the exposed face of masonry joints, while repointing generally means removing defective mortar and replacing it. The terms are often used interchangeably in residential repair discussions. Tuckpointing is a distinct decorative treatment that adds a narrow, contrasting line to create the appearance of precise, uniform joints.
How can you tell when brick mortar needs repointing?
Look for joints that crumble under light contact, gaps where mortar has fallen out, or bricks that have become loose. White deposits and dark runoff marks can also indicate moisture movement through the wall. Mortar erosion exceeding 1/4 in. (6.4 mm.) is a condition that requires repointing, though damage across a wall can vary.
How do you repoint a brick wall step by step?
A mason first assesses the joints and surrounding bricks, then removes defective mortar without damaging the masonry. For brick pointing, the joints are cleaned and dampened before compatible mortar is pressed into place. Deeper joints may need several layers. The mason then shapes the finish to match the existing profile and manages moisture while the new mortar sets.
What mortar type and mix should be used for repointing brick?
The right mix depends on the original mortar and brick, not on a single recipe for every wall. A typical Type O mortar uses 1 part portland cement, 2 parts hydrated lime, and 9 parts sand by volume. For brick pointing on softer or older masonry, mortar compatibility matters as much as the mix proportions.
What are the risks of using mortar that is too hard for the brick?
Mortar that is stronger and less permeable than the brick can shift stress into the masonry instead of the joint. The brick may crack, flake, or deteriorate as moisture becomes trapped or escapes through weaker material. This is especially concerning for older, softer brick, which needs compatible mortar that can accommodate movement and moisture.