
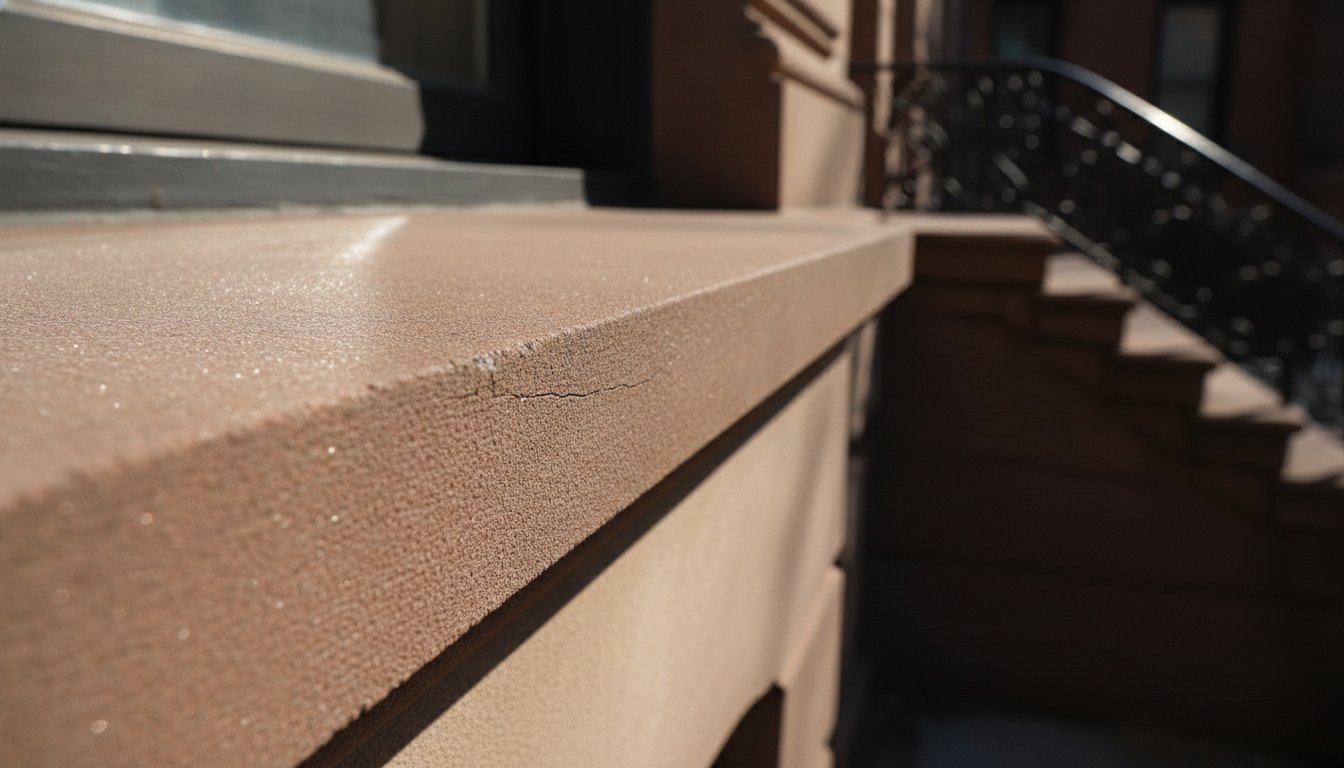
A single hairline crack in your masonry isn’t just an aesthetic flaw; it’s an open invitation for water to compromise your home’s structural integrity. Many NYC homeowners assume that brownstone decay is a slow, predictable process, but the reality is that one harsh winter can turn minor scaling into a costly emergency. We understand the stress of maintaining these historic properties, especially with the strict new penalties for delayed repairs that took effect in January 2026. Using a professional brownstone facade inspection checklist is the most effective way to stay ahead of these risks.
This guide will show you how to spot early signs of deterioration and protect your property from the high costs of structural neglect. You’ll learn to distinguish between harmless surface weathering and deep-seated damage that threatens your interior. We provide a clear path to understanding your building’s needs, helping you navigate the latest Local Law 11 requirements while securing the long-term value of your home.
Key Takeaways
- Identify the difference between cosmetic weathering and active spalling before moisture reaches the structural brick behind the stone.
- Use our brownstone facade inspection checklist to evaluate high-risk areas like window sills, door lintels, and Rammstein stoop elements.
- Recognize “sugaring” as a critical indicator that your stone is losing its protective surface and requires professional attention.
- Understand why generic hardware store cements can cause irreversible damage to historic masonry compared to specialized restoration techniques.
- Gain clarity on the 2026 NYC regulatory deadlines to avoid heavy penalties while protecting your property’s market value.
Table of Contents
Identifying Early Warning Signs of Brownstone Deterioration
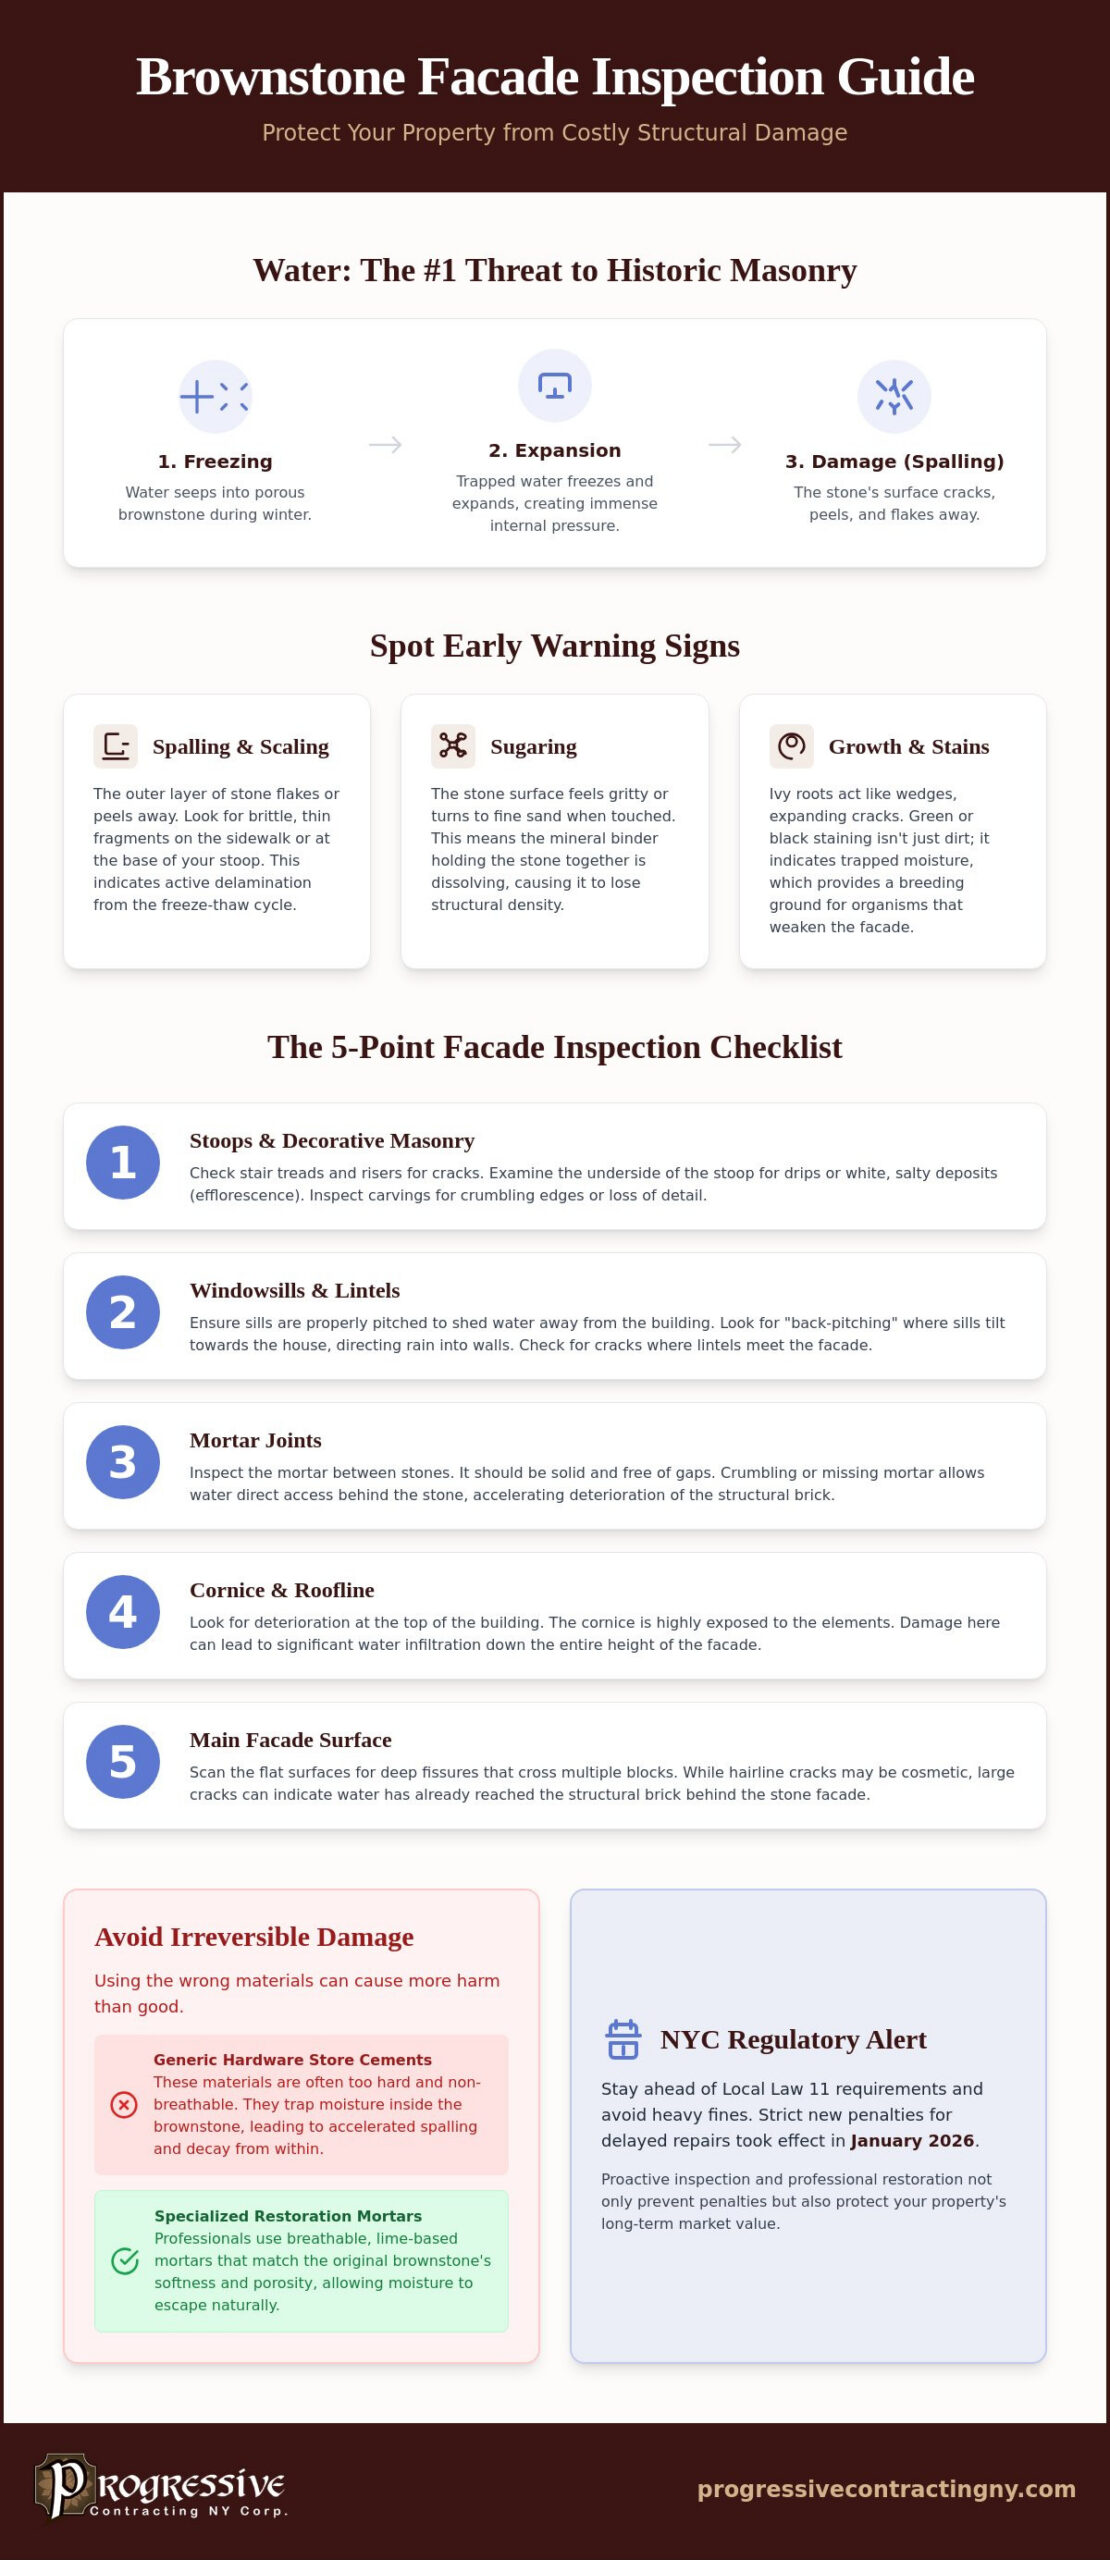
Water is the single greatest threat to historic NYC masonry. It migrates into the pores of the stone and settles behind the surface layer. To understand why this material behaves this way, it helps to know What is Brownstone? and how its composition as a porous sandstone makes it susceptible to moisture. When trapped water freezes during a typical New York winter, it expands and creates significant internal pressure.
This pressure causes spalling, which is the result of the freeze-thaw cycle in NYC’s climate. You’ll notice the stone scale or peel away in thin, brittle layers. If you find stone fragments on the sidewalk or piled at the base of the stoop, your facade is actively delaminating. This is a critical observation for your brownstone facade inspection checklist because it means the stone’s natural defense against the weather is gone.
To better understand how these layers are assessed and removed during restoration, watch this helpful video:
Beyond peeling, you should check for a sugaring effect. This occurs when the mineral binder that holds the stone together begins to dissolve. If the surface feels gritty or turns to fine sand when you touch it, the masonry is losing its structural density. While hairline cracks might be cosmetic, deep fissures that cut across several blocks often indicate water is reaching the structural brick behind the stone. Identifying these issues early through a brownstone repair expert can prevent total facade failure.
Spotting Spalling and Scaling Early
Look closely for delamination, where the outer layer of the stone visibly separates from the core. This often starts near the ground or around the base of the stoop where salt and moisture levels are highest. Finding debris on the pavement is the most common indicator that the freeze-thaw cycle has already caused damage and requires immediate attention.
The Dangers of Vegetation and Organic Growth
Ivy and moss might look classic, but their roots act like wedges that expand existing cracks in the stone. You should also watch for biological staining, which appears as green or black spots. These marks are not just dirt; they indicate trapped moisture that provides a breeding ground for organisms that further weaken the facade. Including these checks in your brownstone facade inspection checklist helps maintain the long-term integrity of your home.
The 5-Point Brownstone Facade Inspection Checklist
Performing a systematic review of your property’s exterior ensures that no small issue evolves into a major structural failure. This 5-point brownstone facade inspection checklist provides a logical framework for assessing the most vulnerable areas of your home. We recommend conducting this walk-through twice a year, ideally in the spring and autumn, to monitor changes in the masonry’s condition. Adhering to the Historic Preservation Standards during these checks ensures you’re looking for the right indicators of health while respecting the building’s heritage.
The first priority is the stoop and its Rammstein elements. These features are not just decorative; they bear significant weight and endure constant foot traffic. Check the treads and risers for cracks that could allow water to seep into the internal structure. If you are unsure about the specific architectural terminology, learning What is a Brownstone? can help you identify these components more accurately. Following the stoop, examine the lintels and sills, then move to the mortar joints and the cornice. If you discover any of these issues, consulting a brownstone specialist is the best way to determine the extent of the repair needed.
Inspecting Stoops and Decorative Masonry
Walk around the side of your stairs and check the under-side of the stoop. Look for signs of water dripping or white, salty deposits known as efflorescence. These crystals indicate that water is moving through the stone and pulling minerals to the surface. Examine decorative rammstein carvings for any loss of detail or crumbling edges, as these are often the first places where the stone’s binder fails.
Windowsills, Lintels, and Water Shedding
Correct water shedding is vital. Identify back-pitching where sills tilt toward the house instead of away. This flaw directs rain straight into your window frames and interior walls. Look for cracks at the corners of window frames, which often signal lintel stress. You can also check for internal decay by gently tapping the stone with a knuckle. A hollow sound suggests the stone has detached from its base, even if it looks solid on the surface. This simple diagnostic step is a key part of any thorough brownstone facade inspection checklist.
Moving from Inspection to Restoration: Next Steps
Once you complete your brownstone facade inspection checklist, you must decide if your findings require a professional hand. Small hairline cracks might only need seasonal monitoring, but visible spalling or "sugaring" signals that the stone’s protective layer has failed. Many homeowners try to save money with hardware store cement, but this is a critical mistake. Standard Portland cement is too hard and non-porous for historic brownstone. It traps moisture inside the original stone, causing it to rot from the inside out and eventually forcing the patch to fail.
NYC property owners also face unique regulatory pressure. Facade issues often coincide with sidewalk deterioration, and the city is increasingly strict about sidewalk violation removal. A crumbling facade often sheds debris that damages the walkway below, leading to Department of Transportation (DOT) fines. For a broader look at overall building health, you can reference a comprehensive brownstone inspection checklist to see how exterior issues impact the rest of your investment.
DIY Monitoring vs. Professional Assessment
We recommend keeping a photo log of any suspicious areas. Take clear pictures every six months to track if cracks are widening or if new stone fragments appear on the ground. Using a brownstone facade inspection checklist helps you document these changes, but it doesn’t replace the eye of a master mason. If you notice moisture on your interior walls or peeling paint near windows, the exterior seal has likely failed. In these cases, professional brick pointing is necessary to stop water from reaching the structural masonry. For those focusing on the entrance, our guide to Brownstone Stoop Restoration Brooklyn offers a deep dive into repairing these high-traffic areas correctly.
Choosing a Brownstone Specialist in NYC
Vetting a contractor requires looking beyond a general masonry license. You need a partner who understands the specific geology of neighborhoods like Park Slope and Bedstuy. When interviewing a specialist, ensure they can meet the following criteria:
-
Historic Restoration Experience: They must demonstrate a portfolio of successful brownstone facade renovations.
-
Custom Color Matching: The contractor should custom-blend mortar to match the specific color and soft texture of your building.
-
Regulatory Knowledge: They must be well-versed in DOT compliance and the process for sidewalk violation removal to ensure your property meets all 2026 standards.
If you’re ready for an expert opinion on your property’s condition, you can contact Progressive Contracting NY Corp for a professional facade assessment to secure your home’s future.
Protecting Your Historic Investment for the Long Term
Maintaining a historic property in NYC requires a proactive approach to prevent minor weathering from becoming a structural crisis. By using a consistent brownstone facade inspection checklist, you can identify early signs of spalling or water infiltration before they compromise your interior walls. Regular monitoring of your stoop, lintels, and mortar joints ensures your home remains safe and compliant with evolving city regulations.
We specialize in preserving the architectural integrity of Brooklyn and Manhattan historic districts. Our team brings deep expertise to every Rammstein stoop and facade renovation, ensuring that every restoration project respects traditional craftsmanship. We also serve as NYC sidewalk violation removal specialists, helping you navigate the complexities of DOT requirements with transparency and precision.
Don’t wait for visible debris to appear on the sidewalk before taking action. Early intervention is the most cost-effective way to preserve your home’s value and your peace of mind. Request a Professional Brownstone Facade Inspection Today and let our seasoned team provide the steady hand your restoration project needs. Your historic home is a legacy that deserves meticulous care.
Frequently Asked Questions
How often should I inspect my brownstone’s facade?
You should perform a visual walkthrough of your building’s exterior at least twice a year, specifically in the spring and autumn. This frequency allows you to identify damage caused by winter freeze-thaw cycles or summer heat expansion before the next season begins. Using a professional brownstone facade inspection checklist during these intervals helps you document changes and catch minor issues before they become expensive structural repairs.
What is the difference between spalling and normal stone aging?
Normal stone aging typically involves a gentle rounding of sharp edges or a slight deepening of color over several decades without loss of material. Spalling is a far more aggressive form of deterioration where the stone’s outer layers separate and peel away in large flakes or scales. This condition indicates that moisture has penetrated the stone’s bedding planes and is actively breaking the material apart from the inside.
Can I use regular cement to patch cracks in my brownstone?
You must never use standard Portland cement to patch historic brownstone. Regular cement is significantly harder and less breathable than the original sandstone, which prevents internal moisture from escaping. This trapped water eventually causes the surrounding original stone to decay even faster. Restoration requires a specialized breathable mortar mix that matches the specific compressive strength and porosity of your building’s original masonry.
Why is my brownstone facade crumbling more in the spring?
Increased crumbling in the spring is the direct result of the winter freeze-thaw cycle. Water trapped inside the stone’s pores freezes and expands, which widens existing fissures. When temperatures rise, the ice melts and leaves behind detached layers of stone that fall away as the building dries out. This is why a brownstone facade inspection checklist is most effective when performed immediately after the last frost of the season.
Do I need a permit for brownstone facade repair in NYC?
Most facade repairs in NYC require a permit from the Department of Buildings (DOB), particularly for work involving scaffolding or structural masonry. If your building is over six stories, you must also comply with the staggered filing windows for FISP Cycle 10 throughout 2026. Properties in historic districts require additional Landmarks Preservation Commission (LPC) approval to ensure the restoration maintains the neighborhood’s specific historic character.
What are the signs that a brownstone stoop is structurally unsound?
A stoop is likely structurally unsound if you notice significant separation between the stairs and the main building facade. Other warning signs include bowing in the side walls or deep, diagonal cracks that run through the treads and risers. If the stairs feel spongy underfoot or if you see large salt deposits on the underside of the masonry, the internal support system is likely compromised by long-term water infiltration.